
If you haven’t eaten Babka before, you are missing out in life. I have to consciously resist this cake because I have a tendency to eat the whole thing! It might be my most favorite cake, however it must meet my one requirement which is tons of chocolate gooey filling (the best part). Babka tends to dry out fast so I usually freeze it and defrost when I would like to indulge or for serving guests. Freezing works really well with this cake. Freezing it also keeps me from eating the whole thing! Also, almost all recipes for Babka are for 2 full loaves. Maybe thats because it takes a substantial amount of time to make, therefore you mine as well make two and keep one for later (or if you super generous, give the second one away). This is no casual undertaking but all the time and effort put into making this recipe is worth it once you take one bite.
I was first introduced to chocolate babka cake when I was around 18 years old. Ok Im sure I ate babka growing up as a kid, but at 18 years old, I was introduced to the best babka I ever ate in my life! I don’t know how I lived life before this cake! I moved to NY and was living in my grandparents house in Brooklyn. Every shabbat they brought home a chocolate babka cake from a local bakery and it was the best thing i have ever eaten in my life! I was addicted ever since. So this is my warning to you–be aware that if you eat this cake, you may get addicted and eat the whole thing.
I finally found a recipe that replicates the chocolate babka I ate in my grandparents house. I like to make chocolate babka myself because, not only is it impressive to guests and fairly simple to make (even though it takes time), but i also like extra chocolate inside. When I buy babka cake elsewhere, I find myself digging into the nooks and crannies to get that one mouthful of chocolate–why are they so skimpy!!?? So if Im going to eat calories, it better be worth every bite!
So why am I making this Eastern European yeast-risen coffee cake that takes over a day to make? As I have expressed already, its my favorite! But in addition to that, I have family coming over for Shabbat this week and I know they will appreciate this parve Chocolate Babka!
I will not be using a crumble for the top of the cake, or any nuts within, however you can add this to your babka if you prefer. I just like mine simple and delish.


Chocolate Babka Cake (2 loaves)
Dough
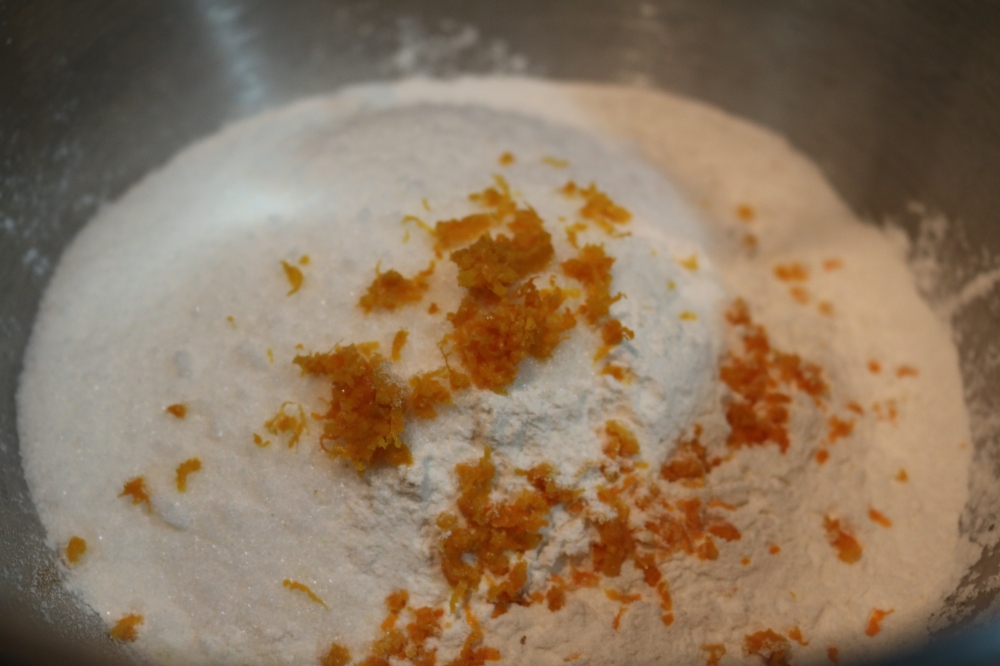
4 1/4 all-purpose flour, plus extra for dusting
1/2 cup sugar
1 tablespoon fresh yeast or 2 teaspoons rapid-rise yeast
1/2 cup water
Orange zest, about 2 teaspoons
3 eggs
Scant 1 teaspoon salt
2/3 cup unsalted margarine, room temperature
Sunflower oil for greasing bowl
Filling
9 ounces parve bittersweet chocolate or 1 1/2 cup of parve bittersweet chocolate chips
1 cup margarine (2 sticks)
1 cup powdered sugar, sifted
2/3 cup 100% cocoa powder (unsweetened)
You can add nuts here or cinnamon if you prefer, but I don’t.
Syrup
1/3 cup water
6 tablespoons sugar
Dough:
In a bowl or measuring cup, place 1 tablespoon fresh yeast in 1/2 cup of water and set aside for a minute or two. If you are using rapid rise yeast then skip this step.
In mixer bowl, add the flour, sugar, fresh yeast water mixture (if you are using rapid rise yeast instead of fresh yeast then put yeast plus 1/2 cup water), eggs, and orange zest. With the mixer on low, combine using dough hook. The dough should come together making one mass. If it is too dry, add one tablespoon of water until it comes together. With the mixer still running on low, add the salt and butter a little at a time so it all comes together. If the dough is too sticky, add a pig pinch of flour a little at a time until the dough cleans the side of the bowl and forms a ball. Mix it on high for about 10 minutes. You will need to stop the machine a few times and clean the hook and sides of the bowl to make sure it is all incorporated.
In a big bowl, place some of the oil. Take the dough that you prepared and forms it into a quick ball and place it in the oiled bowl. Coat all sides of the dough with oil. Leave the dough in the bowl, cover with plastic and leave it in the fridge overnight, or at least 8 hours.
Filling:
Melt butter and chocolate in heavy bottom sauce pot and mix together until smooth. Sift the cocoa powder and the powdered sugar into a bowl and then transfer it to the chocolate in the sauce pot. Mix on very low heat until the mixture turns into a paste. Let it cool slightly but not too much because you want it to be spreadable.
Syrup:
Bring sugar and water to a simmer until the sugar is dissolved. Remove and cool. Set aside.
Assembly:
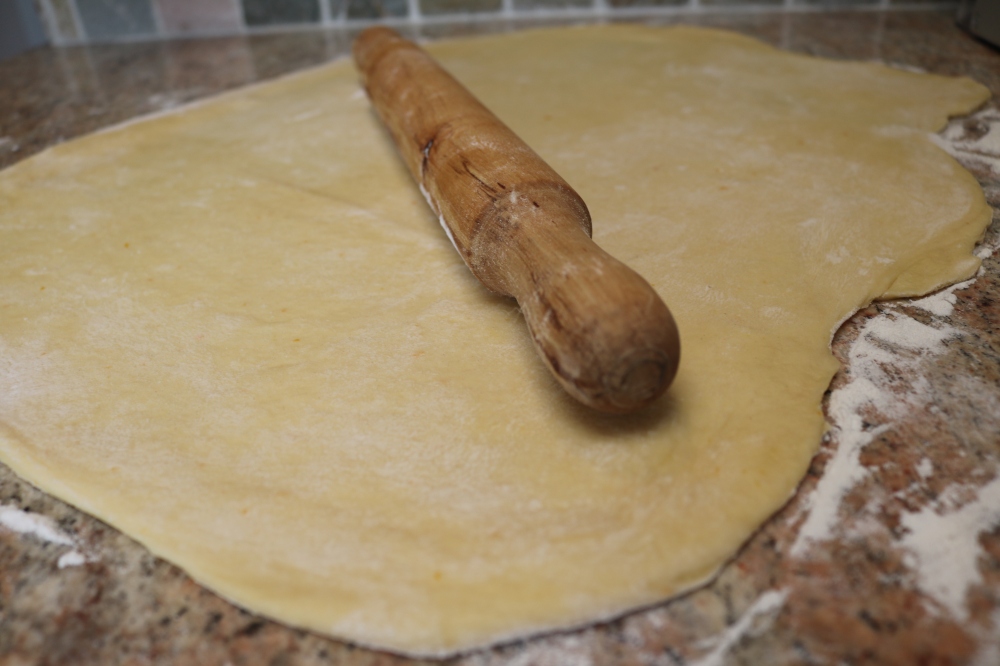
Coat two loaf pans with oil or margarine. I used disposable loaf pans this time. They can be about 9×4′” inches in size. Line the bottom of each loaf pan with a rectangle shaped piece of parchment paper. Take dough from the fridge and cut it in half. You will only be using half of the dough for now so put the other half back in the fridge. The dough is much easier to work with when cold. Flour the counter well and roll out the dough into a rectangular shape–about 10″ wide x 12″ long. You can flip the dough a few time while rolling it out.
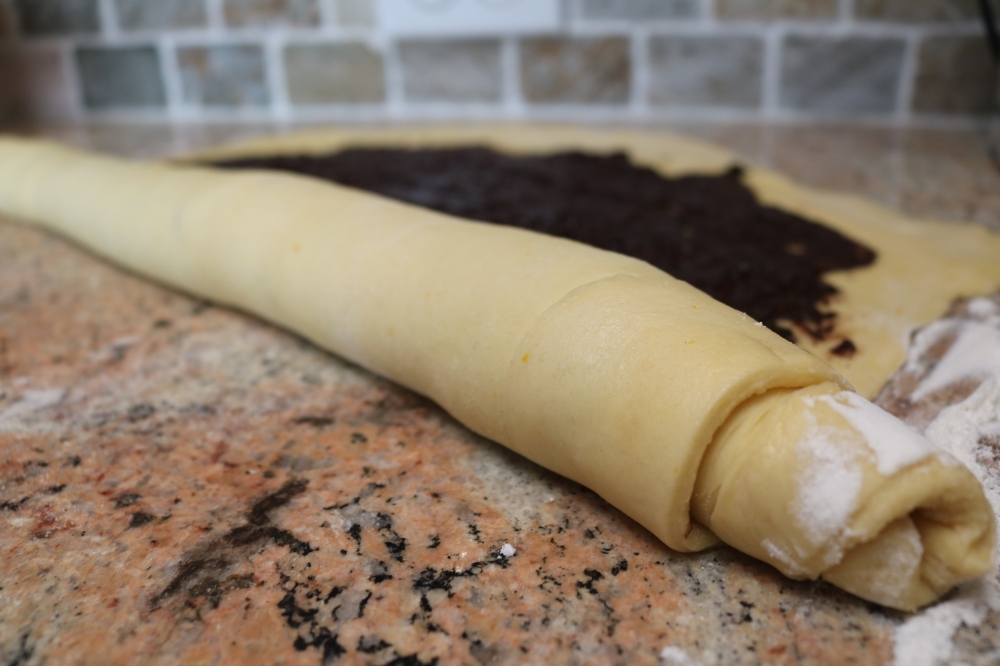
Spread half of the chocolate filling mixture evenly over the dough leaving a 1/2 inch-1 inch border all around. Brush the end farthest away from you with water to seal the dough once rolled up. From the side closest to you, start rolling the dough upwards as tightly as you can into one long snake like looking formation. Transfer the log to a floured baking sheet and let it freeze for 15 minutes so it is easier to cut and twist. Repeat steps with second half of the dough.
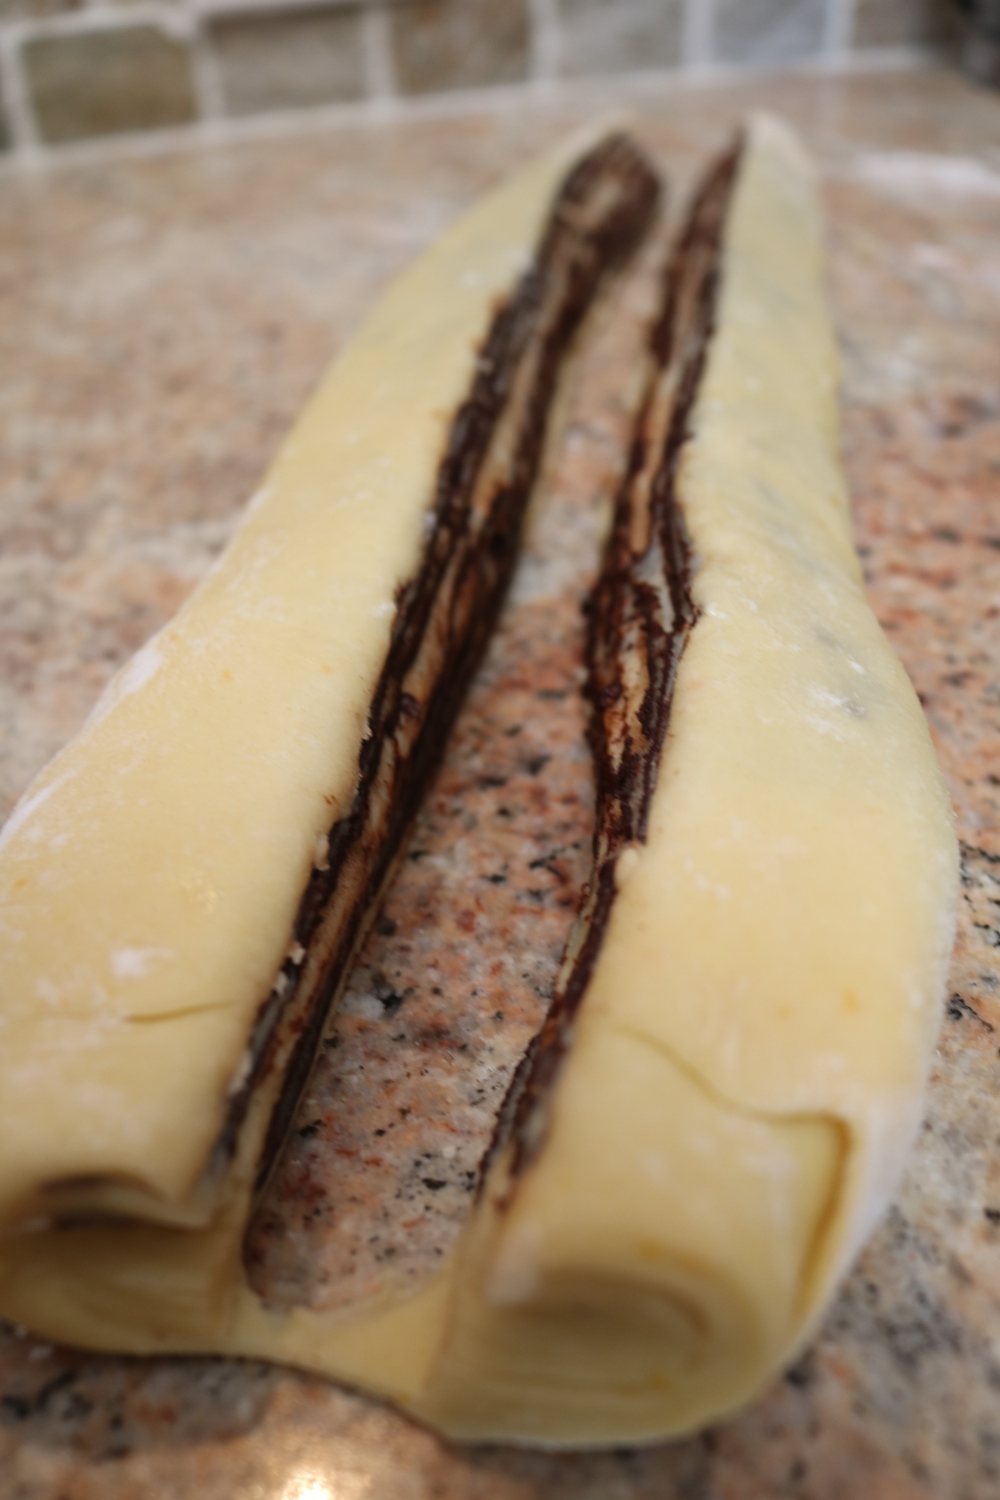
Take dough out of freezer and cut the edges with no chocolate on them off (about 1/2 inch). Gently cut the log in half, lengthwise (as seen in image). Make a “x” out of the two pieces. Starting from the middle point of the “x”, work your way towards your body by placing one leg of dough over the other, making a big twist. Then do the same for the top part of the “x”. Try to make sure that the dough cut sides (chocolate sides) are facing up. This is what will make it look beautiful once baked. Place your twisted dough into the loaf pan. Cover them with a damp towel and let them rise in a warm spot of your kitchen for about 1 1/2 hours.
Once both of the loafs are done rising, place them both uncovered in a 375° F oven for 25-30 minutes on middle rack. If you see that the crust is browning too quickly, then you can cover with aluminum foil. To check that the cake is ready, place a knife into the center of the cake. If it is ready, the knife will come out clean and easily (there may be chocolate on it but no dough). If it is not ready, there will be some stretchy resistance when taking the knife out and there might be some dough residue on the knife. It should definitely be ready by 30 minutes.
When the babka’s are ready and are still hot from the oven, take the syrup and brush a generous quantity over each babka. This will add a beautiful glossy coat and will also preserve the babka to stay fresh.
Let the babka slightly cool before digging in but they are definitely amazing eaten warm!!
Enjoy and please share any comments or questions you may have. I would love to see how yours turns out! Make sure to tag me @lizskosherkitchen if you share it on social media so I can see your masterpiece!
